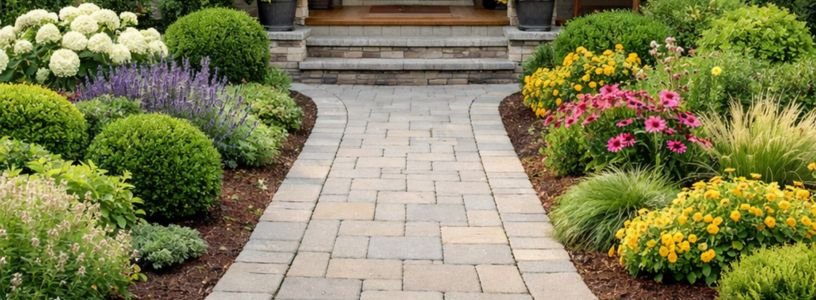
Introduction
I didn’t start out thinking I needed a fire pit.
It wasn’t some grand landscaping plan or a Pinterest-inspired transformation. It was more subtle than that. One evening, sitting in my backyard, I realized something felt… incomplete. The space was there. The silence was there. But there was no reason to stay.
That’s when the idea of a low cost fire pit landscape design started forming.
Not as a project.
But as a solution.
And what I didn’t expect was how something so simple, so inexpensive, could completely change how a space feels, how people gather, and even how often you step outside.
Why a Fire Pit Changes Everything
I’ve noticed something about outdoor spaces.
Most people think it’s about furniture or plants or maybe lighting. But the truth is, without a focal point, everything just sits there… unused.
A fire pit changes that instantly.
It gives people a reason to stay.
There’s actually data behind this too. Outdoor living studies suggest that spaces with fire features see up to 30% more usage time, especially during evenings and colder months.
But what I felt wasn’t a statistic.
It was the difference between stepping outside for a minute… and staying for hours.
Planning a Low Cost Fire Pit Landscape Design (Where Most People Go Wrong)
The mistake most people make is jumping straight into building.
I almost did that too.
Bought materials. Sketched ideas. Watched a few videos.
But then I paused.
Because placement matters more than the pit itself.
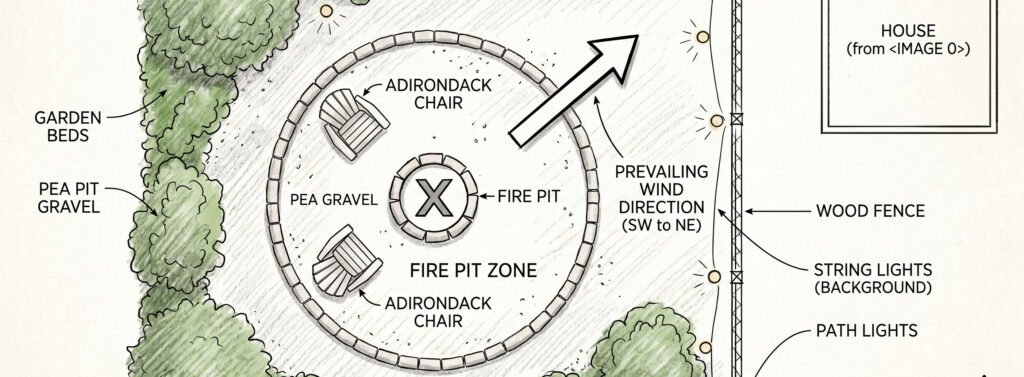
Location Isn’t Just About Space
You need to think about:
- Wind direction (this one matters more than you think)
- Distance from walls (minimum 10 feet)
- Overhead clearance
- Natural flow of movement in your yard
I remember testing the space by just placing a chair where I thought the fire pit would go.
Sat there.
Watched how the air moved.
That told me more than any tutorial.
Size Decisions That Save Money
It’s tempting to go big.
But a 36–44 inch fire pit is usually enough.
Anything larger increases cost, wood usage, and maintenance.
And honestly… intimacy matters more than size.
Materials: Where You Actually Control the Budget
This is where a true low cost fire pit landscape design happens.
Not in the design.
In the choices.
I realized very quickly that materials fall into two categories:
- Things that look expensive
- Things that are expensive
You want the first.
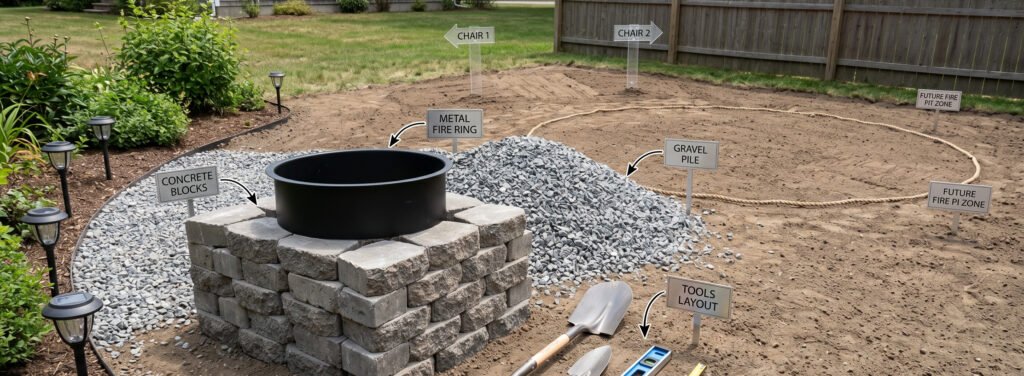
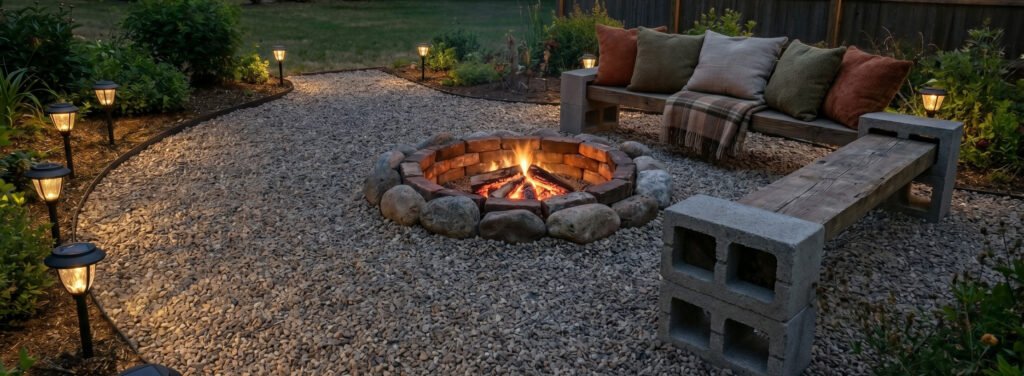
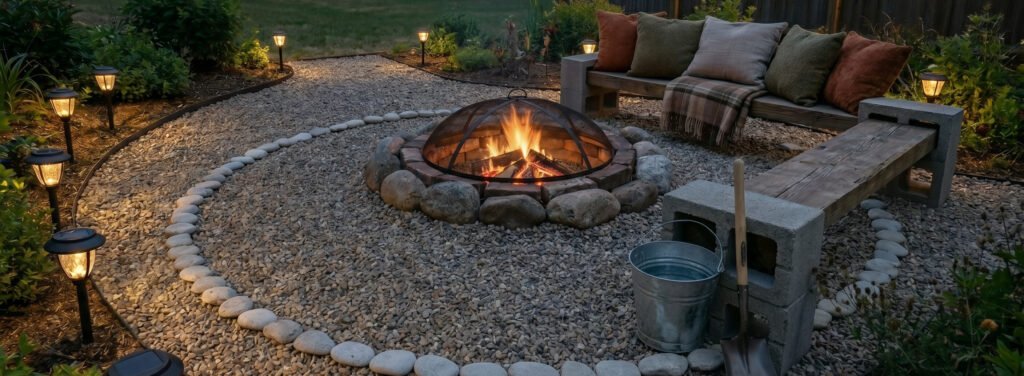
What Worked Best for Me
- Concrete retaining blocks
- Gravel base
- Simple metal fire ring
Nothing fancy. But everything functional.
And that’s the thing people don’t talk about enough… durability doesn’t need luxury.
A basic DIY setup can cost $150–$300, while professional builds often start at $800+.
The Design Ideas That Actually Make Sense
I tried to keep things simple.
Because complexity adds cost… and rarely adds value.
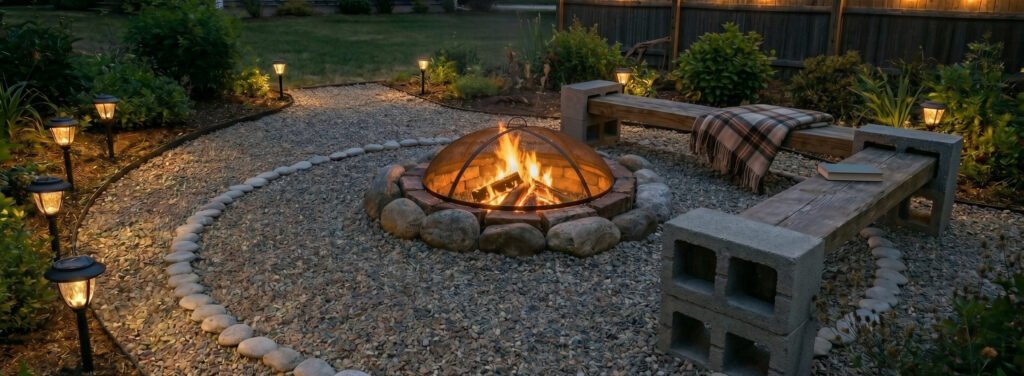
1. Circular Block Fire Pit
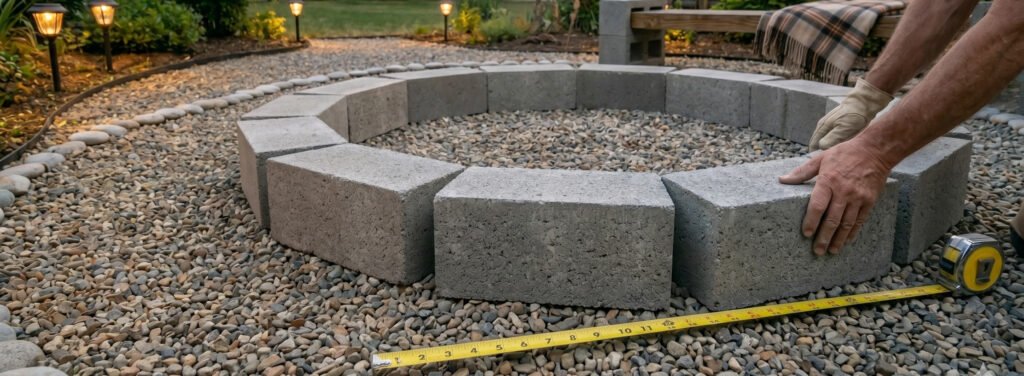
This is the one I built.
It’s almost impossible to mess up.
- Stack blocks
- Level them
- Add gravel inside
That’s it.
And yet… it looks complete.
2. Gravel + Portable Fire Bowl
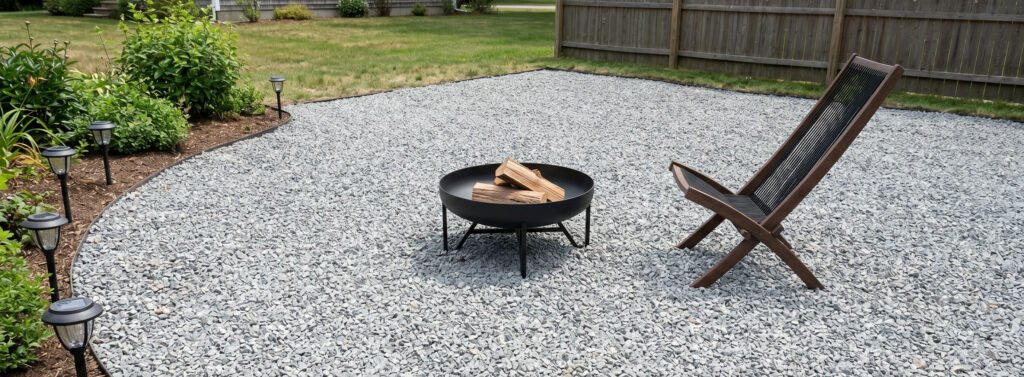
I considered this first.
And honestly, for flexibility, it’s probably the smartest option.
- Costs less
- No permanent commitment
- Easy to move or upgrade
Sometimes the best design is the one you don’t fully lock in.
3. Using What You Already Have
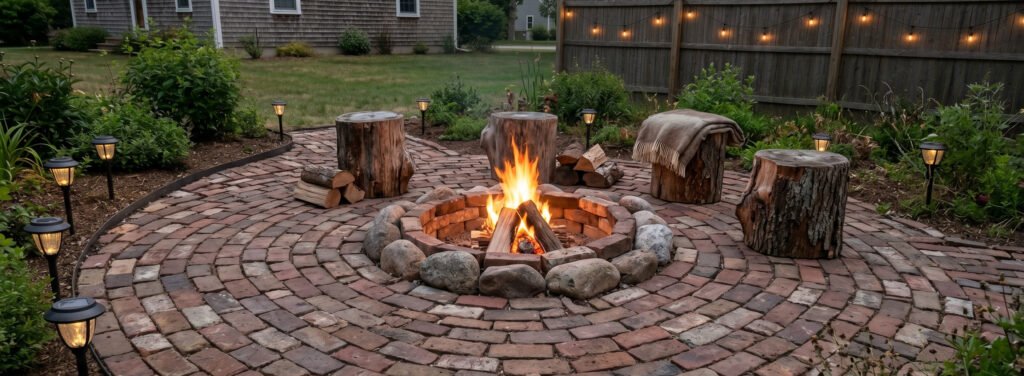
This part surprised me the most.
Some of the best setups I saw weren’t “built” at all.
They were assembled.
- Old bricks
- Leftover pavers
- Tree stumps as seating
It made me realize something…
A good low cost fire pit landscape design isn’t about buying more.
It’s about using better.
Seating: The Most Overlooked Detail
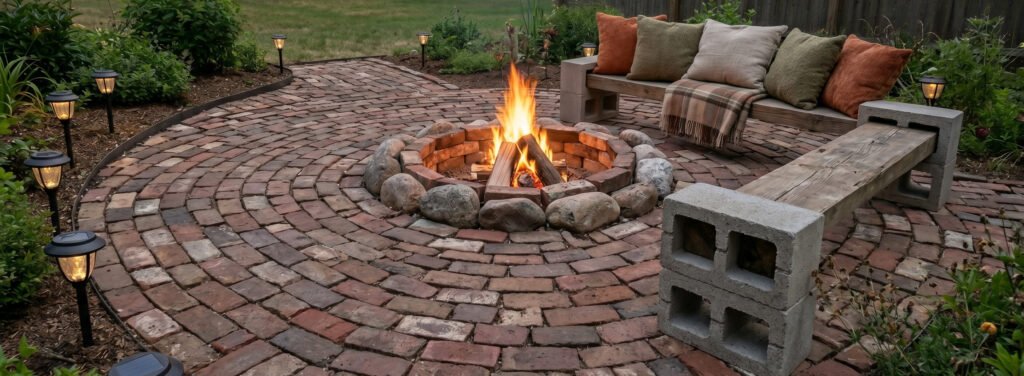
People focus on the fire pit.
But seating is what determines how long people stay.
I tested different setups.
Plastic chairs. Wooden benches. Even just logs.
What worked best:
- 16–18 inch height
- Slight curve around the pit
- Enough space to move freely
Comfort doesn’t need luxury.
It needs thought.
Lighting: The Subtle Multiplier
Lighting changes everything… quietly.
It doesn’t demand attention.
But it shapes the mood.
I avoided anything wired.
Went with:
- Solar lights
- Small LED lanterns
And something interesting happened.
The space started feeling intentional.
Not just functional.
Safety (The Part You Should Not Skip)
I’ll be honest.
This is the part people rush through.
But it’s the part that matters most.
Basic rules:
- 10 feet clearance
- Non-flammable materials
- Water or extinguisher nearby
- Never leave fire unattended
Simple decisions prevent expensive mistakes.
What It Actually Costs (Real Numbers)
Here’s what my setup looked like:
- Blocks: ~$80
- Gravel: ~$60
- Fire ring: ~$70
- Seating: ~$30 (DIY)
- Lighting: ~$40
Total: ~$280
And it didn’t feel cheap.
It felt complete.
That’s the difference.
If you want a guide of how much it would cost for a custom firepit, you may checkout this landscape cost calculator
The Unexpected Benefits

This is the part no guide really explains.
A fire pit doesn’t just change your yard.
It changes your habits.
You step outside more.
You sit longer.
Conversations stretch.
Silence becomes comfortable.
And that’s not something you can measure easily.
But you feel it.
Common Problems (And What I Learned Fixing Them)
- Smoke blowing toward seating → reposition based on wind
- Uneven blocks → base wasn’t compacted enough
- Too much ash → airflow gets blocked
Every issue had a simple fix.
But only after noticing it.
Final Thoughts
If I had to do it again…
I wouldn’t change much.
Maybe I’d plan seating a little better.
Maybe test wind direction earlier.
But the core idea stays the same:
A low cost fire pit landscape design isn’t about saving money.
It’s about spending it where it matters.
And leaving the rest out.
Because in the end…
It’s not the materials people remember.
It’s the moments around the fire.